StarWind Software:
StarWind iSCSI SAN allows you to build your own SAN for your virtual servers. Here in this topic I will take you step by step to build your own shared storage for your server.
- Download a trail version from StarWind website: http://www.starwindsoftware.com/starwind
- Install StarWind Software, and its an easy next next finish inistallation.
- Double click on the StarWind tray icon to open the StarWind management console.
- Add your local host machine as a server by clicking the icon “1”. “Add new host” windows will apear, so keep the dafault localhost ip “127.0.0.1” and the port “3261” then click ok.

- Click icon “2” to connect to your server, a login windows will appear. The default login/password: root/starwind.

- To create your own virtual device, click icon “3” or right click “Targets > Add Target”.

- Add Target wizard will appear,type your target alias.

- Choose “Hard Disk > Basic Virtual > Image File device > Create new virtual disk”.

- Click “…” to browse your disks then choose the location of your image and its size.

- Choose “Allow multiple concurent iSCSI connection (clustring)” to allow servral hosts to connect to this image concurntly.
- For the caching mode keep the default then click “Next”, then wizard will display a summary window for your setting, click “Next”, then “Finish”.
Now there is nothing to do with starwind and we will connect to this disk by using iSCSI Initiator.
- Start iScsi Initiator “Start Menu > Admonistrative Tools > iSCSI Initiator”.

- Click Discovery tab > Add button.

- Type the ip addr of the your iSCSI array (StarWind Software machine) and keep the default port then click ok.


Note: you will need to open this port on your firewall.
- To connect to your target, click Target tab then click Log On.
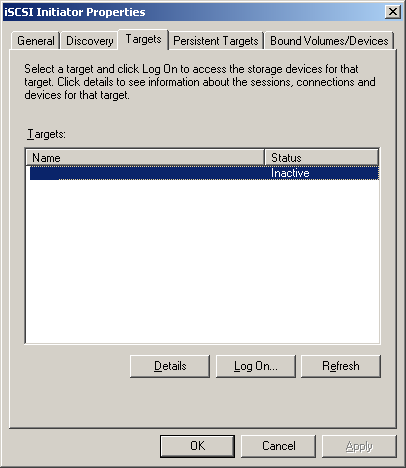
- If you want your server to connect to this volume automatically when your system boots, choose the “Automatically Restore This Connection When The System Boots “ check box.

- Now everything is ok.

- you can click ok and exit the program.
One final step is needed to make your virtual SAN avaiable, you will need to initialize and format your disk, so:
- Open “Disk Management” under (Server Manager > Storage > Disk Management).
- Click it and make it online then click again to initialize it.
- Format the disk as NTFS.
No comments:
Post a Comment